Showing posts with label Scotch ATG. Show all posts

Thursday, February 3, 2011

Valentines!

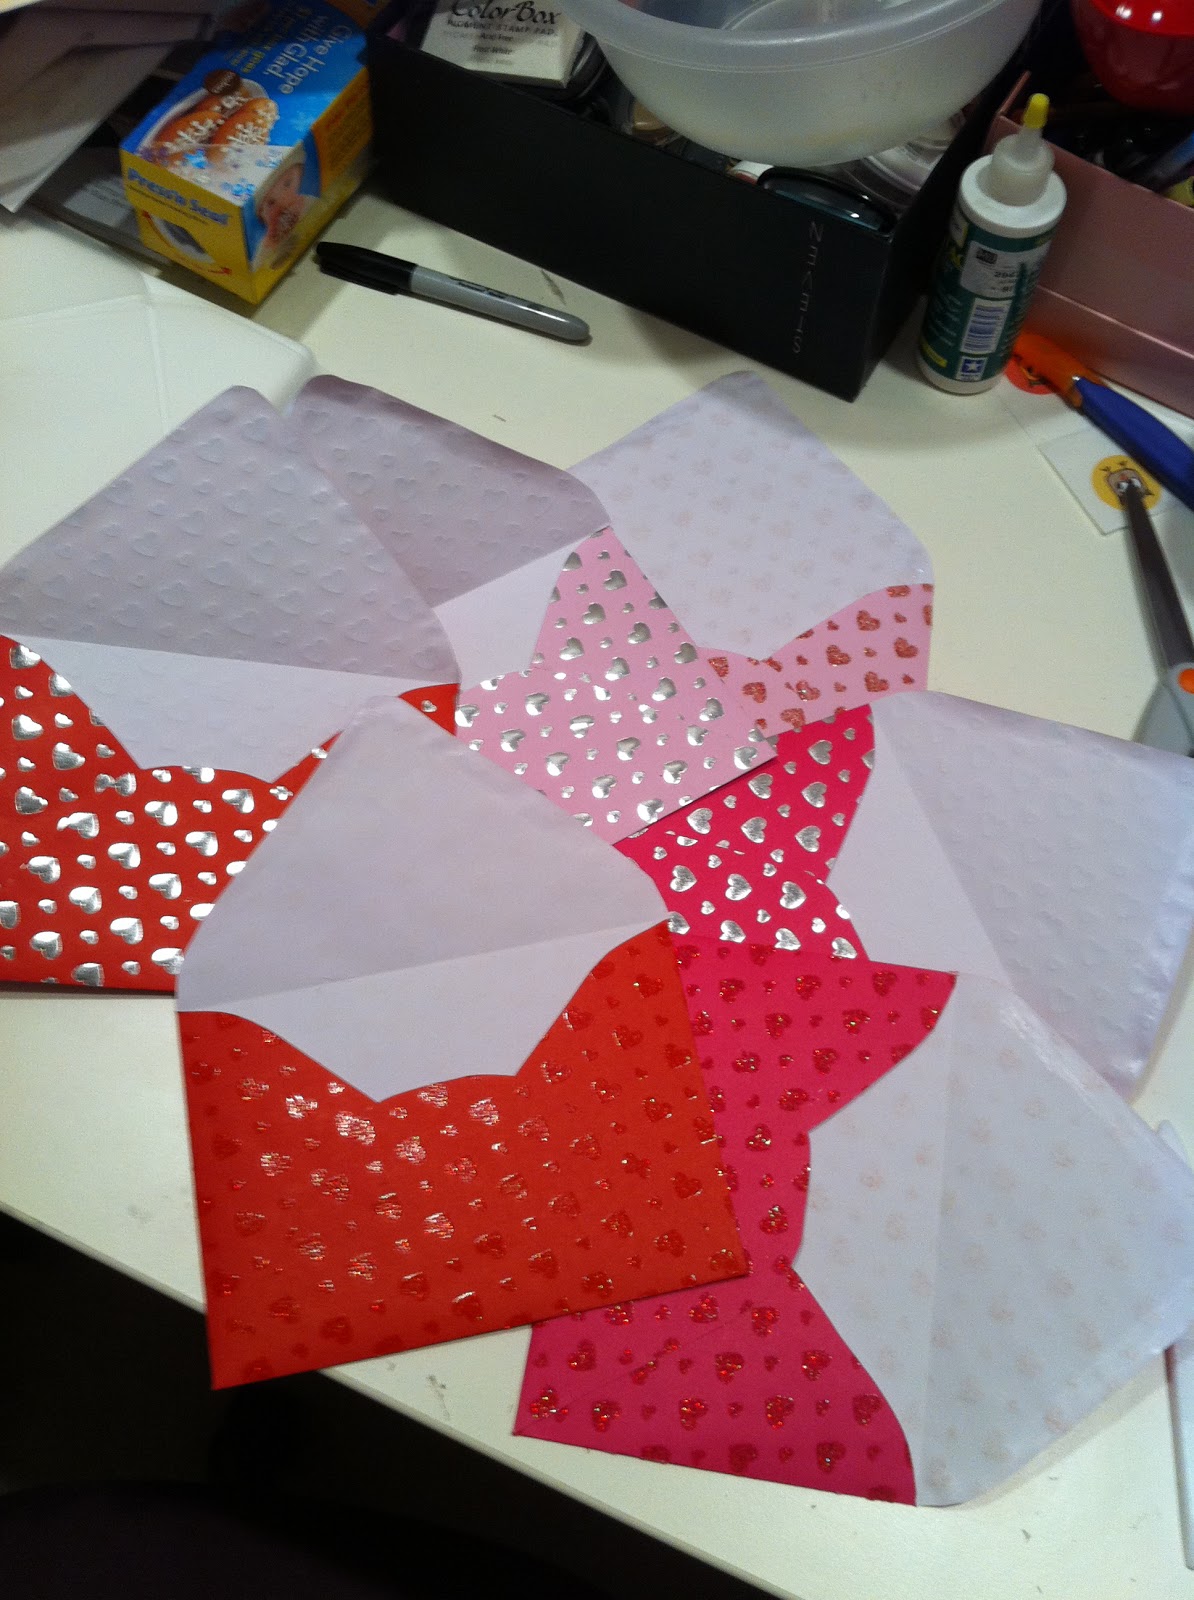
What I started out with, not great,
but it'll do.
I started my Valentines a long time ago and wasn't too thrilled with them. Upon second look though, I decided that I could dress them up and they would be just fine.  Here is what I started with >>>>>>

I decided to add a few things...
The things I added...

Supply List 

I wanted to add something to the A7 heart cards as I was using them as backings.  The other day when I was in Paper Source I saw the new Rose Stamps and I had to have them. They are adorable and I love the clean lines. I tested two different colors of ink, Lipstick Red and Charcoal.  I decided on the red since charcoal roses are not natural. 

My test papers...
Once they were all stamped, I stuck the smaller hearts onto them and I was done.  Super easy. They fit perfectly in the envelopes that I made and lined.  In the next few days, I'll totally finish this project and send them out.  


Since the world is turned upside down and it is snowing in Houston, Texas, I'm hoping to do a very fun snow blog tomorrow!!!

Wednesday, February 2, 2011

Envelope Lining With Love

I have a thing about envelopes. They are the first impression that someone has of your event, or of you. So why not make them fabulous?  It takes less than three minutes to line an envelope and add a little bit of class to your notes.

Supply List (very similar to yesterday's)

OK, enough about that...Here's another...

Pictorial Tutorial-Envelope Lining
Gather your supplies...Place your liner on the paper that you are going to use and trace it...

Take your stamps and stamp them onto the paper before you cut out the liner. It's so much easier to do it this way...

If you used the ColorBox with the clear top and black bottom (slow drying pigment), you'll need to heat dry it with your heat tool. If you don't, it will NEVER EVER DRY. Seriously, you can leave it for a week and it will still be wet, especially on the Stardream paper, which has a coating on it. If you use a chalk ink or an ink specially formulated for vellum (like a Brilliance Ink Pad) then it should be fine. 

Cut out the liner once the ink is dry and stick it into your envelope.  I always fold over the flap before I tape it down to make sure that I have the correct placement. 

Use your tape gun and make a triangle on the liner and then stick it to the flap.

OMG!  Wasn't that super easy????  So fun!

For this project I used regular paper, but in my other projects I've used Japanese paper, lokta paper, regular wrapping paper and even tissue paper.  The only thing that I've ever found that hasn't worked out so well is card stock or cover weight. It's just too thick to fold nicely. 

Tomorrow I'm going to make cards to go inside the envelopes. I made some other Valentines but I don't like them, so I'm going to switch it up...See you then!

Tuesday, February 1, 2011

Homemade Envelopes

~Pretty Paper~
Since Valentine's Day is less that two weeks away, I figured that I should get my Valentines out and in the mail. To do this though, I need envelopes, envelope liners and Valentines!!!  We'll work on this over the next few days.  Today, I got started by making envelopes out of this paper that I found in the $1 bin at Target.

Supplies:

Making envelopes is super fun.  It's one of my favorite things to do while sitting in front of the television.  Tomorrow, I'll line these which will make them look super fancy. 

A Pictorial Tutorial-Envelope Making


Turn the paper over so that the wrong side faces up. Take the envelope template and place it on the paper and trace it. I call this step, "Kindergarten for Adults." Standard 12x12 scrapbook paper will fit the envelope templates up to size A7. Since I don't like to waste paper, I made the biggest size possible. 

Use your bone folder to score the folds on your envelope. Your template has holes in it just
for this purpose (so handy).

Cut out the template using your Exacto or a pair of scissors.  If you choose to use the Exacto, don't forget to cut on a self healing mat. These are relatively cheap and will save your craft desk from nicks and dings.  I like using an Exacto to cut out envelopes, but scissors work quite well too.  

Fold on your score lines and make nice and neat creases by using your bone folder. 

Tape the sides and bottom together using the almighty Scotch Advanced Tape Glider.  A note on this fabulous tool...I have many other different tape runners and this one is the best. It is a bit bigger and bulkier, but it's so much the tape is much stronger and it's pink (the ATG, not the tape)!

Obviously you're going to need to be able to seal your envelopes and for this we have the very cool,
"Lick & Stick" glue. It dries pretty fast and you can lick it like you do a regular envelope.
 SO COOL (and cheap too)!!!

Tomorrow we're going to line these babies with some very cool paper that I have yet to purchase...