 |
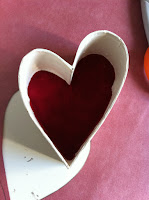
| Heart Shaped Boxes ready to be lined. |
 |
| Fun Tissues and Red Velvet Paper. |
I saw somewhere that Martha Stewart was lining boxes with velvet ribbon and had an "ah-ha!" moment of my own. I've had this red velvety-ish paper for awhile now and I haven't had one good idea as to how to use it. Now I do!
I traced the heart out onto the back of the red paper and then I glued it into the bottom of the box with regular PVA glue. Then when that was done, I measured as much as I could the
 |
| The bottom is in! |
 |
| All lined and ready to go! |
The top and bottom of the box was boring me, so I decided to decoupage it with the pretty heart tissues that I found. I haven't ever decoupaged before, but it was really easy. I used Methyl-Cellulose glue and a paint brush. I could have used Mod Podge, but I didn't want to drag it out of my adhesives box. Also, I had the Methyl mixed for my book binding projects and I don't want to waste it...Anyway, I cut up the tissues into the little heart squares. Then I put them onto the box.
 |
| All cut up. |
 |
| Partly done... |
I continued on with my decoupage and soon I was done. I have to say, this is a really really easy project and I'll do more of this in the future.
I love how it turned out! I think that when I actually use it for whatever I'm going to use it for (undetermined at this point) I'm going to secure it with a ribbon and a wax seal...I shall post a picture when I do this!

No comments:
Post a Comment